How to Create a Year-Round Kitchen Garden
Collaborative Post
Having a kitchen garden that produces fresh goodies throughout all seasons is quite the achievement. Anyone can enjoy the thrill of gathering just-picked veggies for dinner while saving cash on grocery runs.
Gardening helps the planet too, and digging in soil somehow lifts the mood better than many other hobbies. Beginning with a few herb pots on your windowsill or revamping your backyard, the pleasure of home-grown food is unmatched.
Our detailed guide offers expert advice to keep your garden flourishing and vibrant year-round.
Choose the Right Location
Location makes or breaks a garden from the start. Plants generally need plenty of sunshine, about 6–8 hours daily does the trick. If you’re wondering about drainage, just dig a hole, fill it with water, and watch what happens. Slow drainage signals the need for soil fluffing or maybe switching to raised beds instead.
Putting the garden near a water source saves countless steps later on. Adding some hedge plants or fencing creates a cosy microclimate that plants love.
Also, keep the garden where it’s easily visible. Gardens hidden away often get forgotten, while those in plain sight get more attention and care.
Plan for Seasonal Rotation
Crop rotation keeps gardens productive year after year. Switching what grows where maintains soil health and frustrates pests trying to settle in. Grouping plants by families, such as beans, cabbage relatives, onions, and tomatoes, makes rotating easier.
Additionally, spring gardens thrive with beans and peas that actually add nitrogen to the soil naturally.
Summer calls for hungry eaters like tomatoes and peppers that gobble up all that nitrogen. However, when fall rolls around, broccoli and cabbage make perfect sense as they handle whatever nutrients remain. Winter gardens become home to carrots and onions that don’t mind the quieter growing conditions.
Keeping a garden notebook helps tremendously. Just jotting down what grew where and when creates a treasure map for next year’s planning. This rhythmic plant shuffle typically results in healthier crops and fewer problems overall.
Implement Vertical Gardening
Vertical gardening is perfect when you don’t have much space, especially in cities. Instead of spreading out, plants grow up using walls, fences, and balconies. You can use trellises, wall planters, and hanging pots to make this work.
Peas and beans flourish splendidly on trellises. Opt for vertical planters for strawberries and herbs for optimal growth. Enhance the beauty of hanging pots with nasturtiums. Their vivid hues are truly eye-catching.
Also, safety matters! Everything needs proper anchoring with sturdy materials – metal, wood, or tough recycled plastic – secured with nails or brackets against wind troubles.
Climbing plants appreciate some guidance too; soft ties help them find their way without stem damage. Plus, vertical gardens help air flow and sunlight reach the plants, which makes them grow better.
On top of the practical aspect, vertical gardens look great too. They can turn a boring wall or fence into a lively, green spot, even if your outdoor space is tiny.
By trying out these ideas, you can enjoy a beautiful and useful garden right in your own vertical space.
Use Raised Beds
A prosperous garden involves adding elevated plant beds. These structures lift the soil upwards, serving vital drainage functions. They also promote plant growth and consequently yield richer crops.
Furthermore, the capacity to tailor the soil conditions to each specific type of plant enables it to thrive.
Building an elevated garden is pleasingly achievable and cost-effective. You could build one using timber or recycle old pallets to discover the ideal match for your garden space.
It is advisable to construct the raised bed at a height between 30 to 60 centimetres. This allows plants to develop a solid foundation for their roots while simplifying the tending process. Additionally, restrict its width to not more than 4 feet, ensuring easy access to its centre.
Next, load your freshly prepared planting area with a mix of high-quality soil, compost, and additional nutritive elements like leaf mould or manure. This thoughtfully combined mixture ensures the year-round vitality of your plants.
Choose a location that gets ample sunlight, making upkeep and cultivation a breeze. This will ensure a steadily fruitful kitchen garden throughout the year.
Focus on Soil Health
Soil works as the unsung hero of any garden by silently supporting everything above. For truly productive gardens, soil health deserves top priority.
Start by getting friendly with the soil’s personality through simple pH and nutrient tests. These reveal whether soil leans too acidic or alkaline and show what might be missing. Using this information, you can adjust the soil to cater to the needs of your plants.
Boosting soil fertility is effortlessly achievable with natural components like compost, manure, or leaf mould. They provide nutrients, enhance drainage, and nurture beneficial microorganisms.
Covering the soil with a layer of organic material, such as mulch, is additionally beneficial. It safeguards soil moisture, suppresses weed growth, and thereby reduces the burden of watering and weeding.
Suitable alternatives for mulch include straw or wood chips, which enrich the soil as they decompose.
These techniques sustain perfect nutritional conditions while managing pests and diseases. Tending to your soil leads to the nurturing of a strong, lasting garden.
Implement Efficient Watering Techniques
Watering your plants right is key for a healthy kitchen garden. Be consistent, or they could struggle. Water them early so roots soak it up before the sun dries it out. Morning watering also helps stop fungal diseases that like damp nights.
Furthermore, a drip irrigation system is a clever idea. It gets water straight to the roots and cuts waste. You can set it on timers, so your plants get water even when you’re busy or away.
Collecting rainwater is another great tip. It’s eco-friendly and saves on your bill. Rainwater is soft and chemical-free, perfect for plants.
Mulching is handy too. It keeps the soil moist and stops it from drying quickly. Straw or bark chips are great as they enrich the soil while breaking down.
You will have to watch for signs like yellow leaves or wilting, which could mean too much or too little water, and adjust as needed. With these tips, your plants can stay healthy, giving you a good harvest even in dry spells.
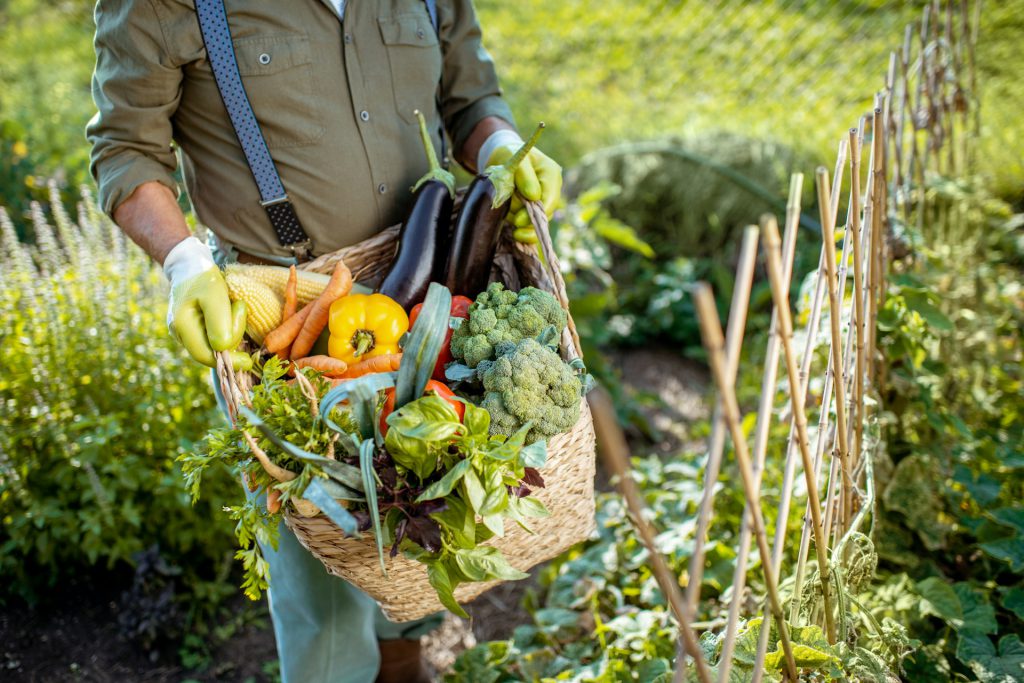
Harvest and Store Produce Properly
Harvesting represents the most rewarding part of gardening. It’s that magical moment when care transforms into food.
Timing matters significantly. Early morning or late afternoon harvests deliver the freshest flavours and longest storage life. Clean, sharp tools minimise damage to both the picked produce and the parent plant.
Protecting the freshness of your gathered crops is of paramount importance. Root crops including carrots and potatoes flourish best in mild heat, limited light, and excellent ventilation. For leafy greens, simply arrange them for storage in the refrigerator later.
Should your harvest exceed your everyday requirements, it’s worth thinking about preserving the excess. By freezing, you can maintain both texture and nutritional value. Alternatively, consider drying, canning, or pickling your bounty for future enjoyment.
Sharing excess harvest with family and friends is a splendid way to foster a sense of warmth, unity, and cheer among the gardening community.
Conclusion
Maintaining a year-long kitchen garden provides immense benefits. It assists in saving cash and advocating a lifestyle that respects our planet.
There’s also excitement in experimenting with plant positioning and innovative techniques like vertical gardening.
Setting off with a small gardening project makes management simpler, and soon you will relish the substantial benefits it brings. Yet, if you need help, don’t hesitate to contact professional gardeners.
All in all, it’s fantastic and exceptionally health-conscious to consume your own home-grown fruits and vegetables.
Image: Getty Images on Unsplash